Mechanical Three Speed Automatic Lego Transmission
Recently I've seen several web pages that show how to make an automatic
transmission out of Lego bricks. All of them try to use the Mindstorm's RCX in
some way. I have yet to find a purely mechanical automatic transmission
documented on the web anywhere. For all of the people like me who really
wanted to see one done without the aid of a microprocessor, but have not been
able to find the information on the web, this page is for you!
This is a discussion of how the locking-differential automatic transmission
works. I've built another kind of
two-speed automatic using the 'sliding worm gear' trick,
but honestly I could never make it work reliably in any kind of
small form factor, so I didn't think it worth documenting. On the subject of
locking differential transmissions, I did build a nine-speed manually shifted
model at one point. I had to write a computer program to figure out gear
combinations that wouldn't overlap with each other, but it did ultimately work.
If anyone is interested,
I might post info on that one as well.
If you have designed a mechanical automatic transmission out of Lego bricks,
please send me an email, I'm interested in hearing about it!
On with the discussion...
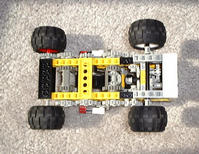 |
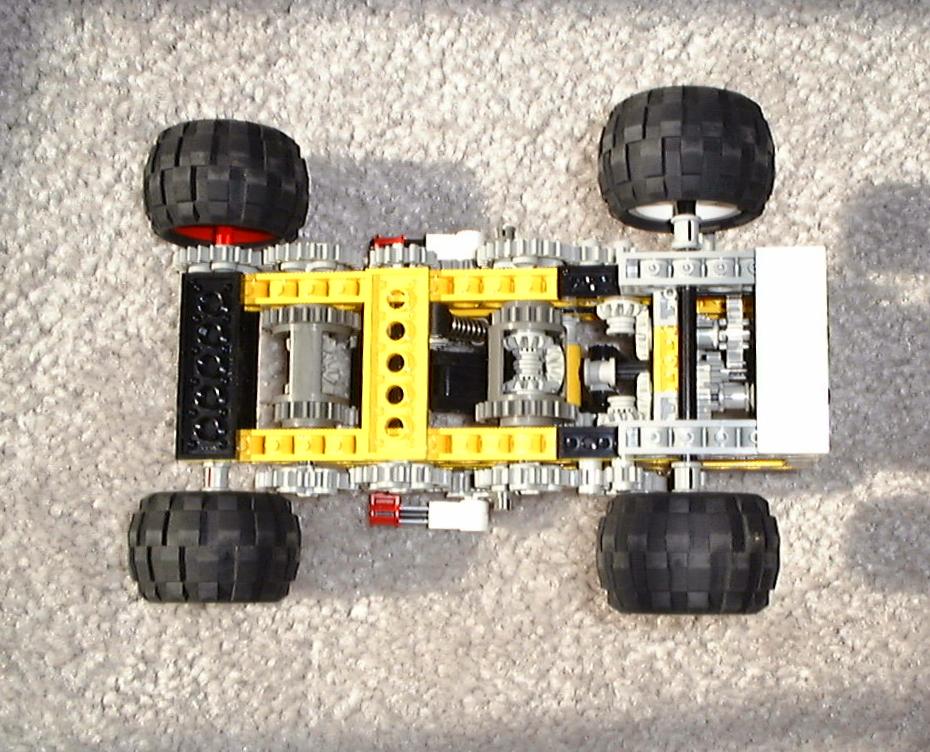
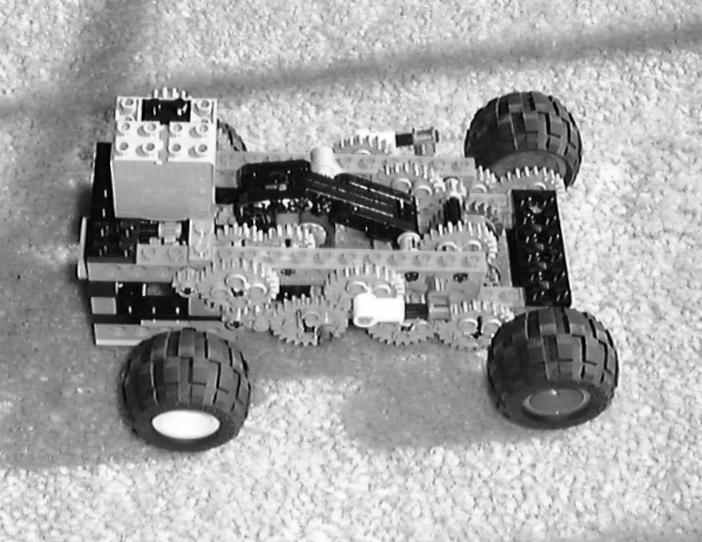
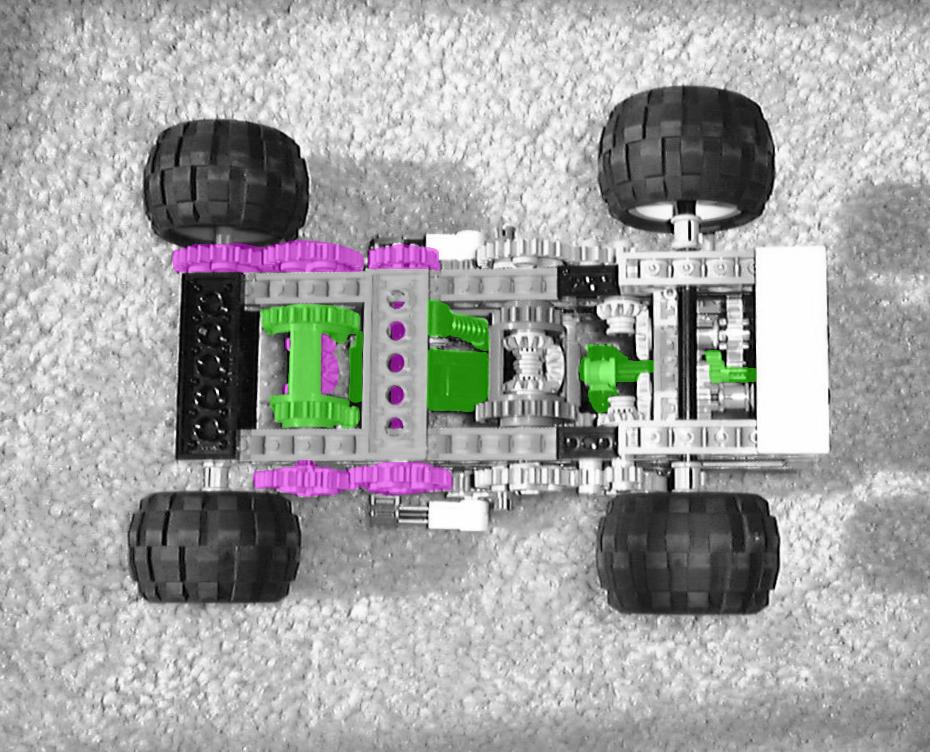
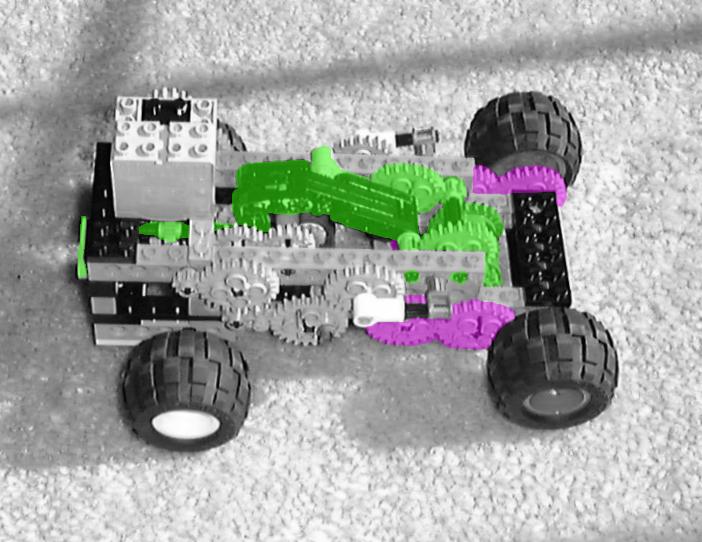
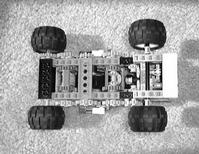
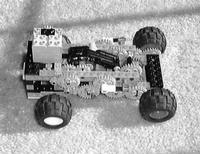
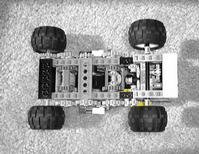
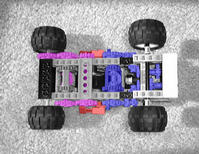
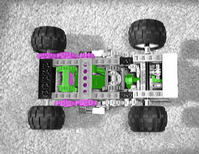
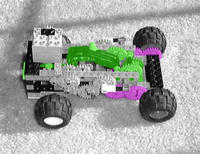
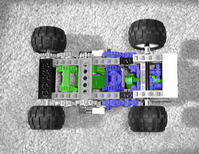
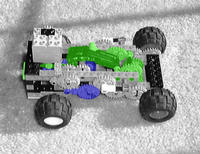
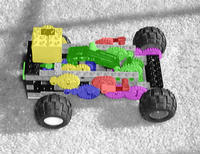
The picture on the left is the underside of the transmission, the picture on
the right is a side view from the top. If you need to get a closer look at any
image on this page, just click on it. The full sized pictures are roughly
950x800 and 120Kb, and definitely show the lack of focus in the camera.
|
 |
 |
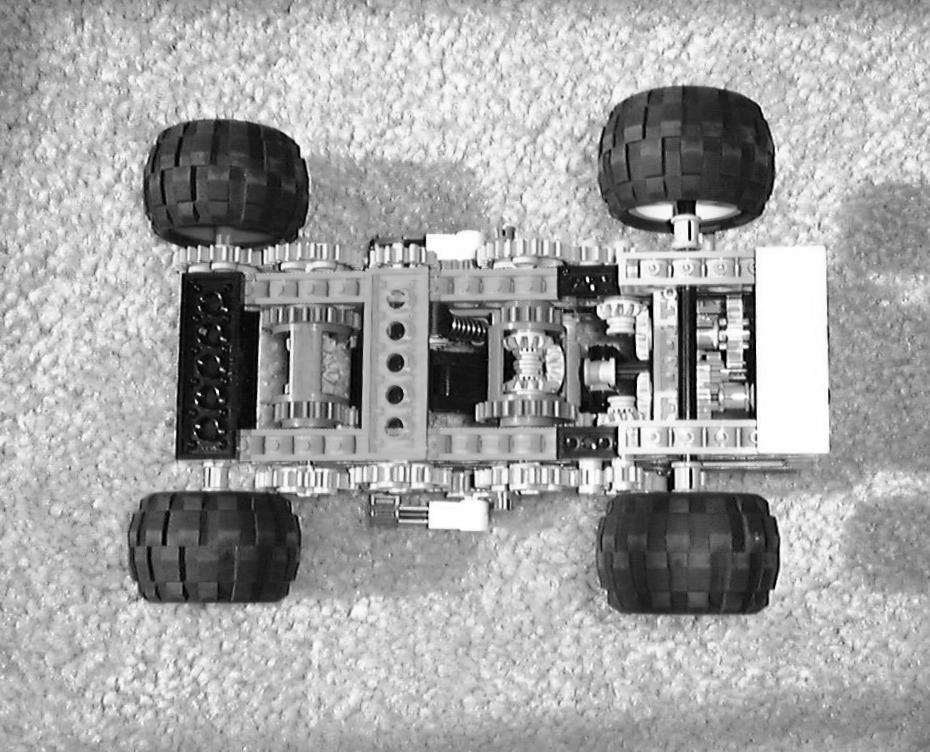
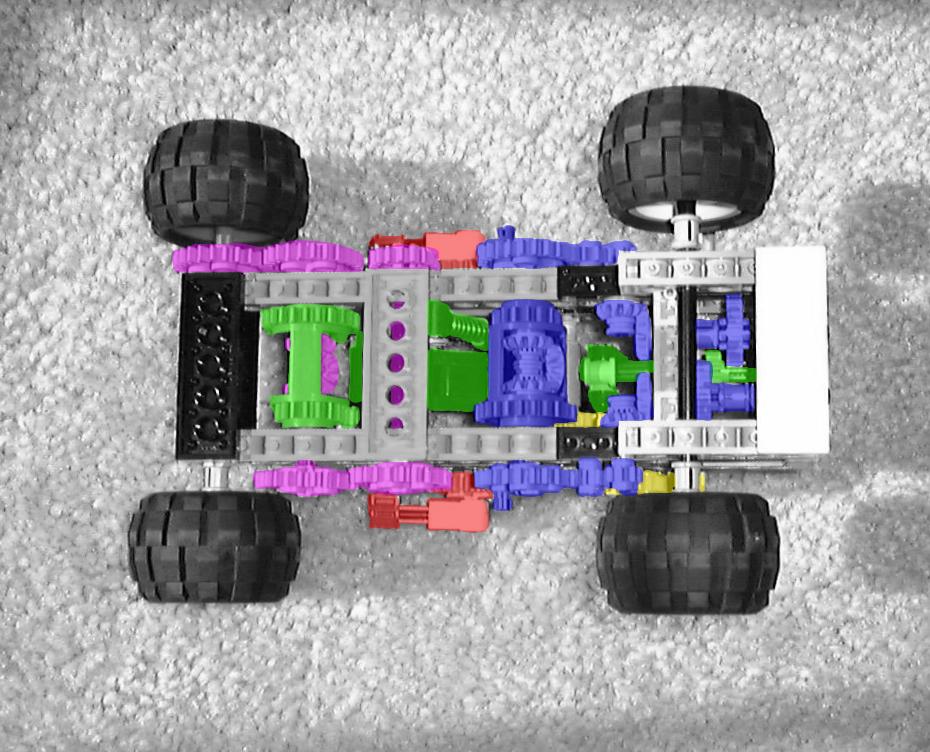
This is what the transmission looks like with the color stripped out.
As I go over how the transmission works, I'll highlight parts of the images
in color. Having the rest of the picture in black and white makes the
highlights stand out better.
|
 |
 |
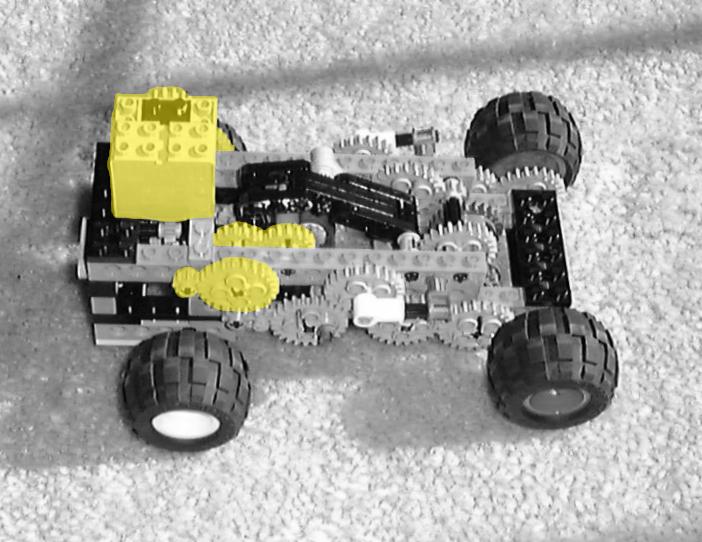
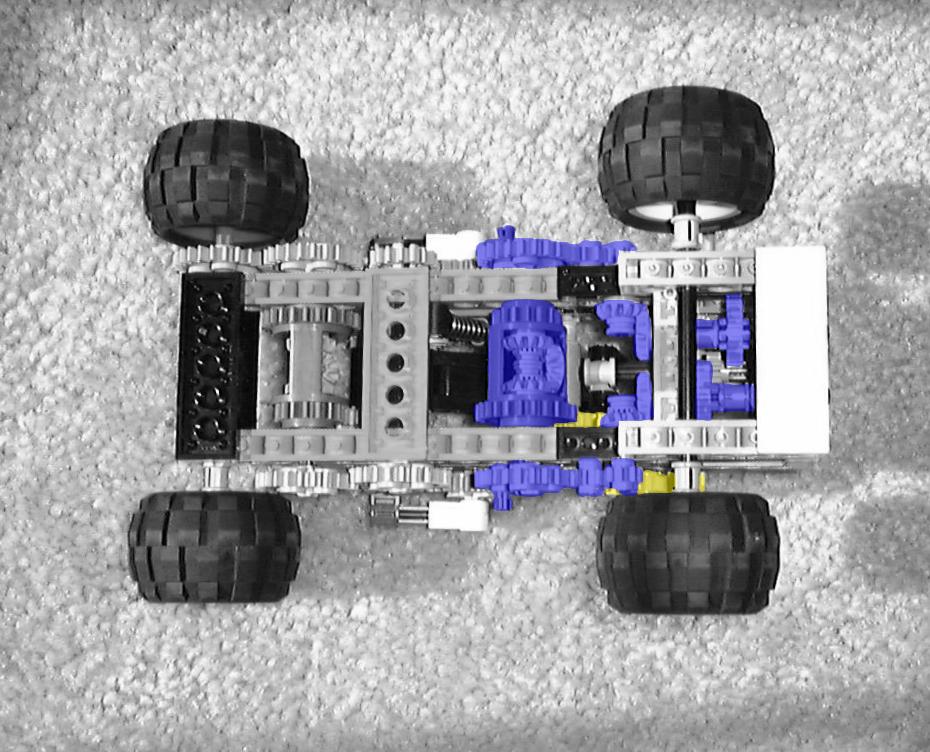
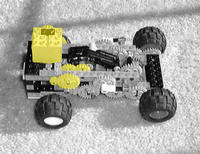
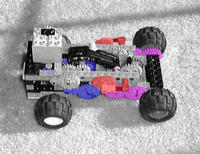
The first part of any transmission is the path that the power takes from the
motor to where the gearing really starts. In this transmission, the power is
applied to the forward differential body. I happened to step the power from the
motor down a bit before connecting it to the differential body, and have
highlighted the step-down part of the gear train in yellow.
|
 |
 |
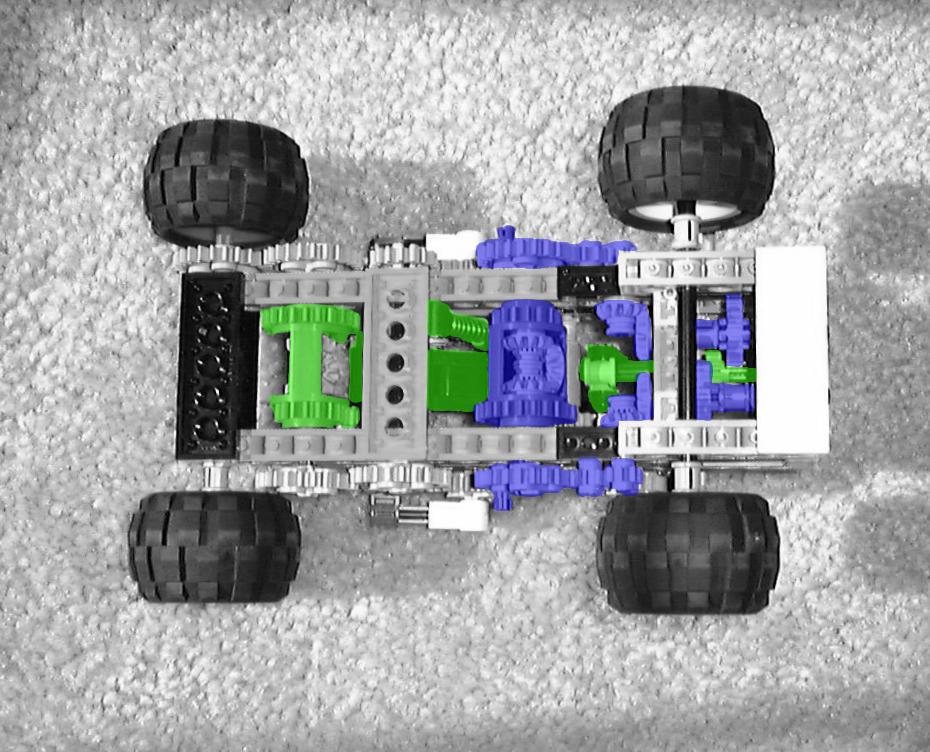
After the power is stepped down from the motor (yellow), it is applied to
the front differential gear body, which is part of the locking gear assembly
that I have highlighted in blue. The section of the locking gear assembly that is
located near the front of the car is designed so that a selector mechanism can
'freeze up' either side of the differential gear, or let them both spin. I'll
highlight the selector mechanism later on in the page. Also, keep in mind that
the front of the car is where the motor (that big chunk yellow of brick) is
mounted. In the top view picture, it looks as if the large yellow gear on the
outside of the car might mesh with the two smaller blue gears below it. It
does not. The yellow gears and the blue gears meet in one place only, on the
large side of the blue differential body.
|
 |
 |
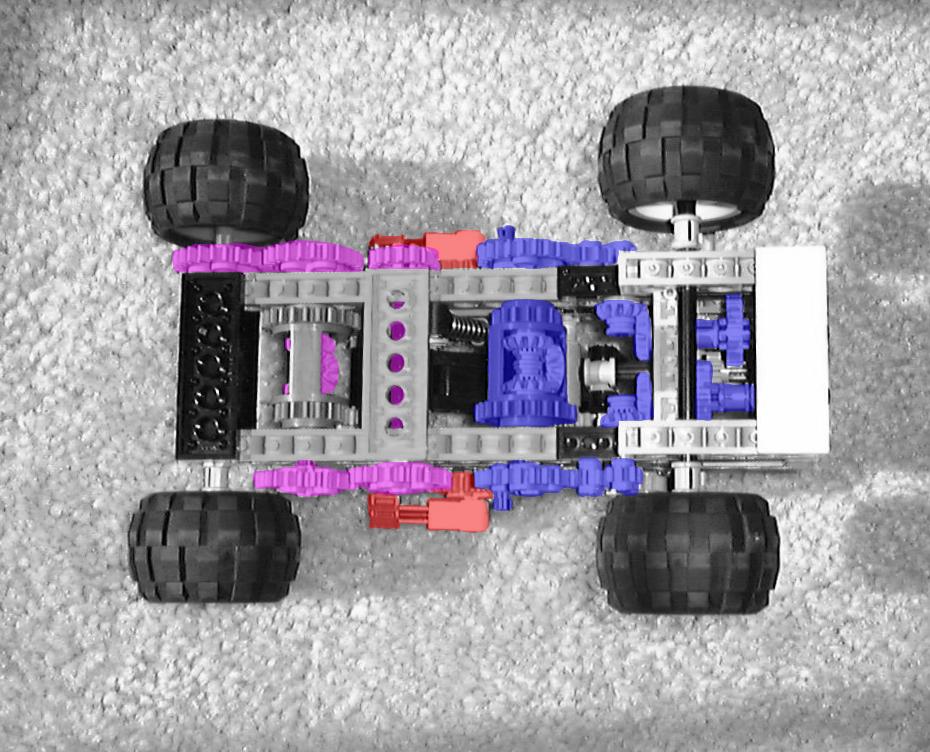
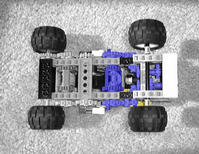
The blue locking gear assembly transfers its power to the rear gear train
(purple) through a pair of ratchets (red). The ratchets are there so that as
either half of the blue locking gear assembly freezes up, the rear gear train
breaks its connection to the frozen half of the blue differential, while
remaining coupled to the rotating half. Notice that the leftmost purple shaft
in the bottom view has a 24 tooth gear on one side, and 16 tooth gear on the
other. That creates two different high gear ratios, depending on which side of
the blue differential is frozen. If neither side is frozen, the rear gear train
receives one half of the average power from both gears-- low gear.
|
 |
 |
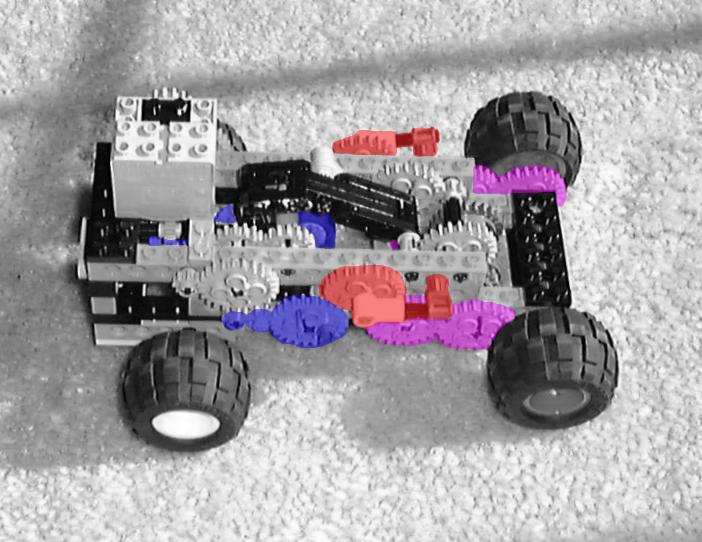
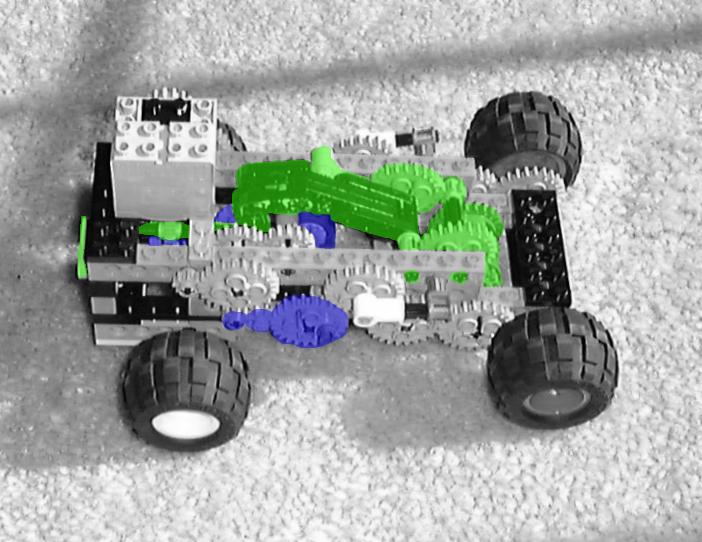
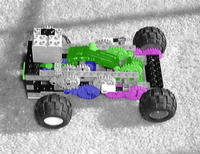
The blue locking gear body can deliver three different ratios depending on
which side, if any, of its differential gear is being kept from spinning. The
gear selector mechanism (green) chooses which side to lock up by using a second
differential gear to measure the difference between the torque being applied by
the motor, and the torque being transfered to the ground via the rear axle.
|
 |
 |
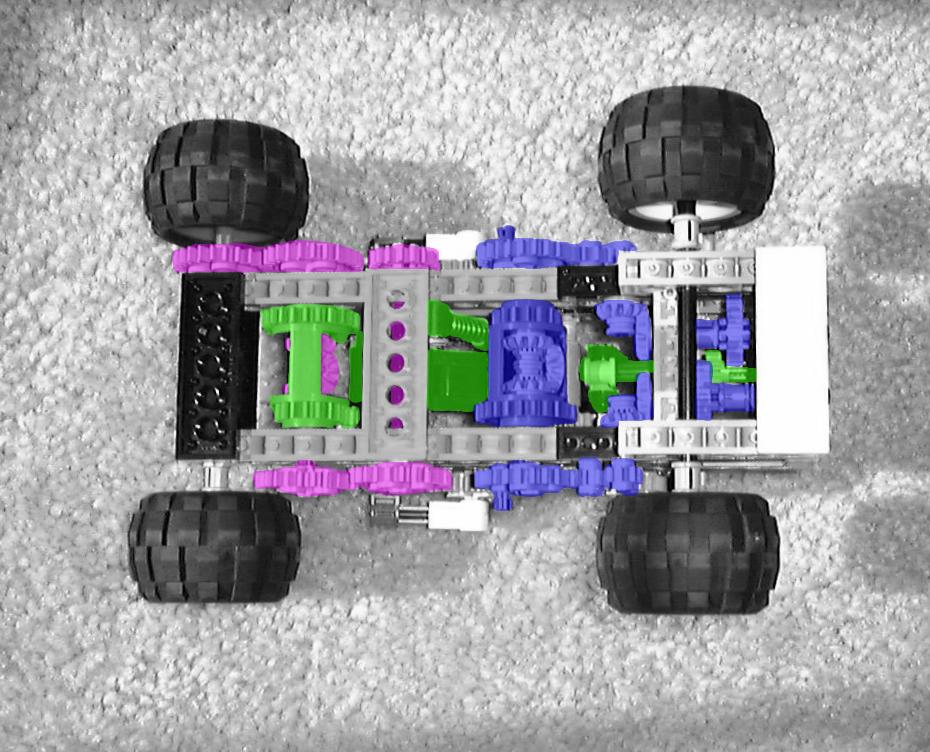
Notice how in the bottom view I have highlighted the body of the rear
differential differently from the gears that are inside it. The purple gears
inside the green differential body are able to spin freely with the rear axle,
but the green differential body can not. Its motion is constrained to approximately.
90 degrees of rotation because it is connected through a gear reduction to the
large, spring loaded arm that can be seen clearly in the top view picture.
As the difference in input motion on the green differential grows with respect
to the output motion on the rear axle, a torque is applied to the differential body, which is transfered to the spring-loaded selector arm.
|
 |
 |
As the green selector arm moves back and forth with respect to the pressure
applied to the rear axle, it moves a small, non-rotating gear into and out of
contact with the small gears in the front of the blue gear locking assembly.
With respect to the front of the car, the small green gear locks either the
left side, the right side, or neither side of the blue differential as the
selector arm it moves toward the front of the car. As the pressure on the rear
axle grows, the car shifts from high to medium to low gear. As the pressure on
the rear axle decreases, the spring moves the selector arm back to the rear,
and the car shifts from low into medium and then into high.
|
 |
 |
These five subsystems work together to make a transmission that can
automatically select between three gear ratios. The motor is stepped down to a
0.148 ratio at the end of the yellow section. The blue locking gear section can
produce three ratios through the red ratchets, 1.200 2.000 3.000, depending on
the position of the green shifting arm. That means the final ratios at the
purple rear axle are 0.178 0.296 0.444.
|
 |
Well, thats it. Maybe if I get some more time I'll take some
mpegs of the thing actually moving. If I do, it'll have to be in Infra-Red,
because of the conversion that I did to my camera. Unfortunately, Lego bricks
tend to look pretty bland in the IR band. In the mean time, I hope you enjoy
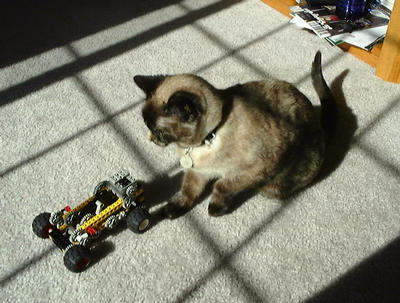
the transmission as much as my cat, Dopey, did!
Update:
I announced this web page to
Lugnet
in the middle of November, 2001. Since then I've
had a bunch of really great email replies. There have been a few recurring
questions that I'd like to answer for people. Here they are!
- Q: Is there an
ldraw
file of this thing somewhere?
A: First a little rant... I'm a Software Engineer by profession. I use my
lego blocks for relaxation after Jetsoning in front of the
computer all day. The last thing I want to do when I come home is to fight
with yet another computer. As such, I dont have a whole lot of interest in
building with virtual blocks. (I dont own an RCX block for the same reason.)
Of course, fate would have it that every email I have recieved so far has
included a request for an ldraw version. So, I bit the bullet and learned how
to use
MLCAD, and created
a .dat model of the three speed automatic
transmission. Its not nearly as satisfying as building with the real thing, but at least now it should be clearer how to build a trans like this one.
- Q: If you run the motor in reverse, what gear do you back up in?
A: You dont. Because of the way the ratchet arms work, the transmission
cant be run in reverse. Both ratchets slip, and no power is transfered to the
rear end.
- Q: Does that mean no engine breaking? What happens when you go downhill?
A: When the car is pointed downhill, both ratchets disengage, and the car rolls
down the hill in neutral. When the slope flattens back out and the car slows
down, the gears automatically re-engage.
- Q: How fast does that car go?
A: I never really ran it through any speed trials. We could calculate an
estimate of how fast it would go though... the lego motor i belive does 300
RPM, and the final gear ratios are 0.178 0.296 0.444. That means the rear
axle is doing 53 RPM, 89 RPM, and 133 RPM. The wheels I am using have a
circumfrence of about 6.5 inches. That makes for 345 inches per minunte, 579
in/min, and 865 in/min. In feet per second, that works out to .5 f/s, .8 f/s,
and 1.2 f/s. Those numbers are pretty close to how fast the car actually goes
in each gear. Going downhill, it really goes fast.
- Q: So how much gear loss does it have? Is there any power left at
all at the back end after going through so many gears?
A: Its not as lossy as you might think. About half of the gears are
part of the locking arm assembly, and dont really spin at all. There is plenty
of power left over, and the gears really do work-- there are hills that it cant
climb in third gear that are no problem at all in first.
-
Q: What HTML editor did you use to make this web page?
A: This page was created by hand with
VIM.
The pictures were created with
The Gimp.
Both were running on Debian Linux.
- Q: Say, arent you quoted in the
Lego FAQ?
A: Sure am! See "Subject 11) Taking pieces apart".
- Q: With regard to the differential in the back that moves the arm,
did you know that what you are doing is called 'transferring the backlash of a
planetary servo'?
A: No, I did not, but if my cousin Dan Gallant of
Gallant Racing Supply says it is true, then
you can bet on it.
- Q: Can you give me a hand with loading up/using/figuring out
MLCAD?
A: Sorry, no can do. I used the program exactly one time, to make
the data file for this transmission, and I had to borrow a windows box to do
it. All I can offer is that I remember it working pretty well after I
figured out how exactly to install everthing. Maybe the installation process
is easier now, but I couldnt say.
Thanks for the questions everyone!
Other Links
Check out what you can do with newer gears! The beveled gears mesh together on the slide a lot better than the old square cut ones.
Copyright 2001-2011 Jeff Jahr < malakais@pacbell.net >
I've been helping run The Last Outpost since '91. If you need a break from
playing with Lego and want to play a fun, free, online multiplayer game, click
the banner link below to go to the games home page.